Video production tutorial (2020)
The DPAC meeting has been cancelled due to the Coronavirus.
This page contains the workshop on video production with Gaia Sky given at the DPAC plenary meeting in Heidelberg on March 4, 2020.
The main aim of this workshop is to provide a birds eye view of the capabilities of Gaia Sky when it comes to producing high-quality videos.
Estimated duration: 1.5 hours
Before starting…
In order to follow the workshop it is recommended, albeit not required, to have a local installation of Gaia Sky so that you can explore and try out the teachings for yourself. In order to install Gaia Sky, follow the instructions in Installation.
When you start Gaia Sky for the first time you will be greeted with a data downloader window. Please download the following data packs:
default-data– Contains the Solar System and some other basic datacatalog-dr2-verysmallorcatalog-hipparcos-newred– The star catalogcatalog-nbg– Neraby Galaxies Catalogcatalog-sdss-12(small) orcatalog-sdss-14(large) – Sloan Digital Sky Survey catalogcatalog-nebulae– Some nebulae images
Then click on ‘Start’.
The User Interface of Gaia Sky
The User Interface of Gaia Sky consists of basically two components: Keyboard shortcuts and a Graphical User Interface in the form of the control panel.
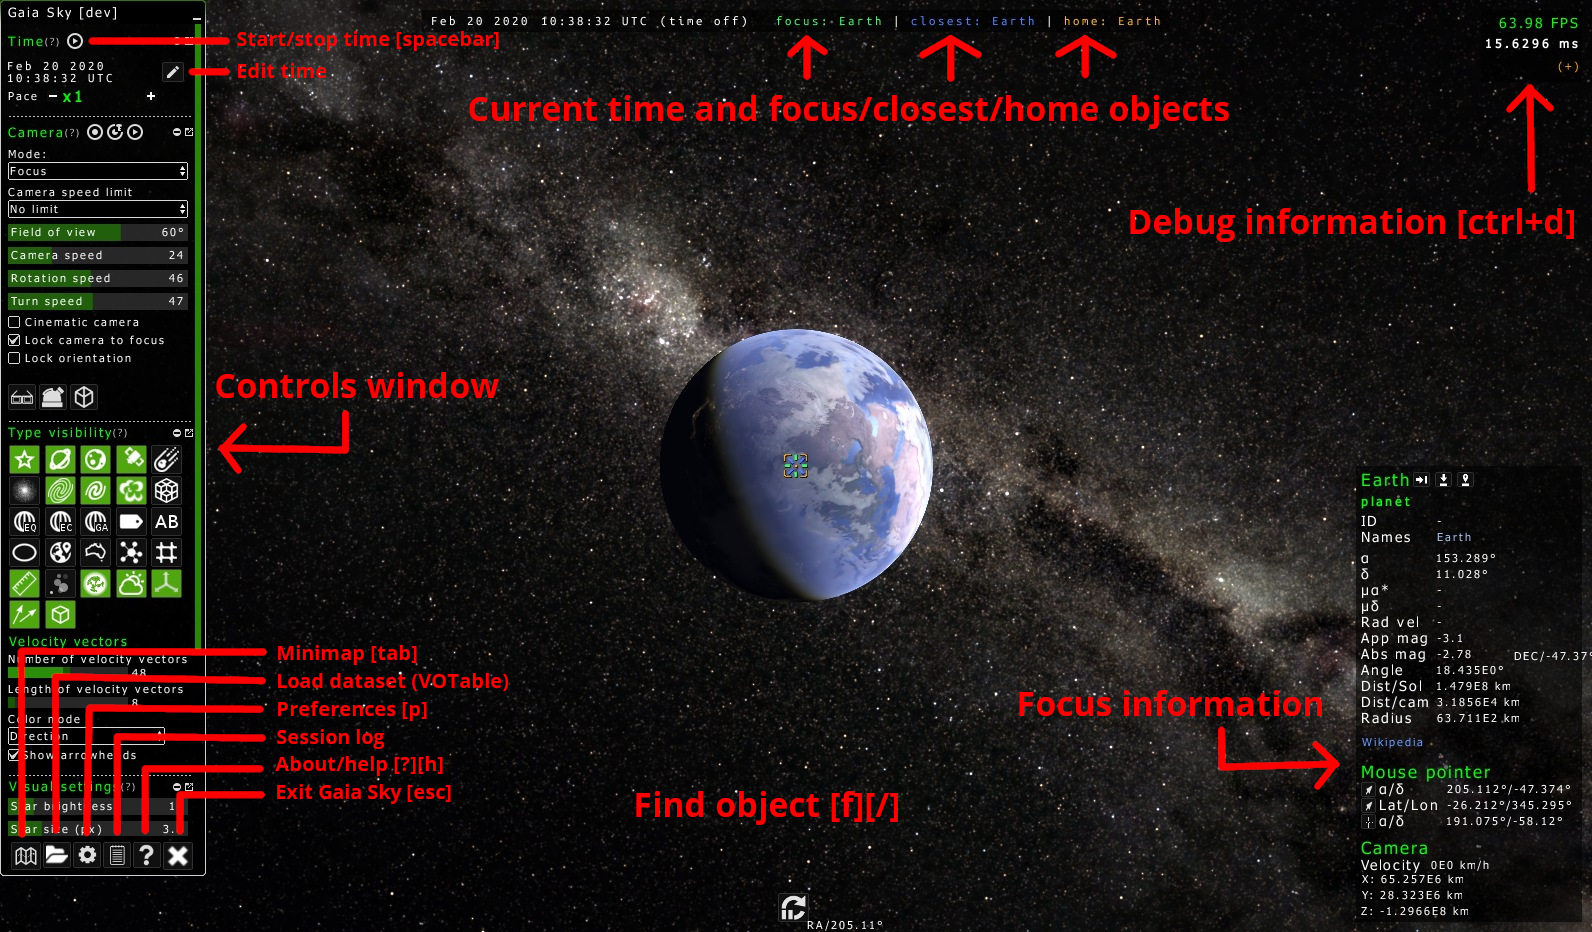
Gaia Sky User Interface with the most useful functions
The UI is descibed in detail in Control panel
The most common key bindings are listed in Controls
Loading datasets
Gaia Sky supports the loading of additional datasets at runtime. Right now, only the VOTable and CSV formats are tested, even though others may also be found to work in some cases. Gaia Sky needs some metadata, in the form of UCDs or column names, in order to parse the data correctly. Refere to the Preparing catalogs section for more information on how to prepare your dataset for Gaia Sky.
The datasets loaded in Gaia Sky at a certain moment can be found in the Catalogs pane of the control panel.
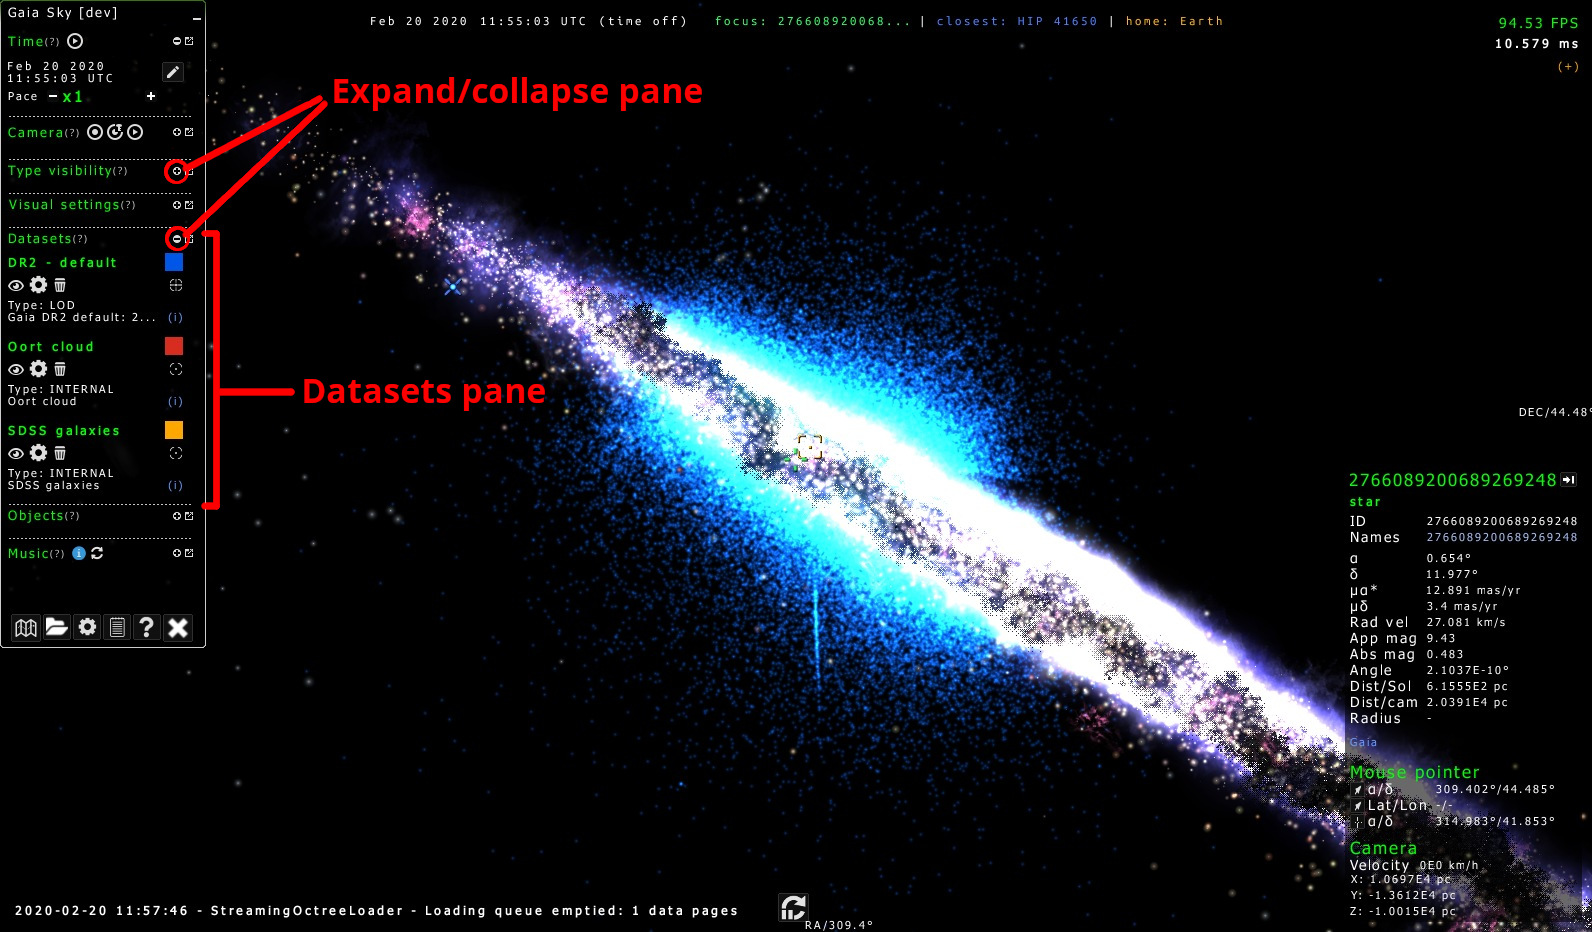
Datasets pane of Gaia Sky
There are three main ways to load new datasets into Gaia Sky:
The user interface
 button
Through SAMP
Via scripting (addressed later on in the workshop)
Loading a dataset from the UI – Go ahead and remove the star catalog (either DR2 dataset or hipparcos) by clicking on the ![]() icon. Now, download a raw Hipparcos dataset from here, click on the
icon. Now, download a raw Hipparcos dataset from here, click on the ![]() icon and select the file to start the loading. In a few moments the Hipparcos new reduction dataset should be loaded into Gaia Sky.
icon and select the file to start the loading. In a few moments the Hipparcos new reduction dataset should be loaded into Gaia Sky.
Loading a dataset via SAMP – This section presupposes that Topcat is installed in the machine and that the user knows how to use it to connect to the VO to get some data. The following video demonstrates how to do this (mirror):

Loading a dataset from Topcat through SAMP (click for video)
Loading a dataset via scripting – Wait for the scripting section to come.
Camrecorder: recording and playing back camera files
Gaia Sky includes a camrecorder feature to make recording and playing back camera files very easy. This comes in handy if you want to showcase a certain itinerary through a dataset, for example.
Recording a camera path – The camrecorder will capture the camera state at every frame and save it into a .gsc (for Gaia Sky camera) file. You can start a recording by clicking on the ![]() icon in the camera pane of the control panel. Once the recording mode is active, the icon will turn red
icon in the camera pane of the control panel. Once the recording mode is active, the icon will turn red ![]() . Click on it again in order to stop recording and save the camera file to disk with an auto-generated file name (default location is
. Click on it again in order to stop recording and save the camera file to disk with an auto-generated file name (default location is $GS_DATA/camera (see folders).
Playing a camera path – In order to playback a previously recorded .gsc camera file, click on the ![]() icon and select the desired camera path. The recording will start immediately.
icon and select the desired camera path. The recording will start immediately.
Hint
Mind the FPS! The camera recording system stores the position of the camera for every frame! It is important that recording and playback are done with the same (stable) frame rate. To set the target recording frame rate, edit the “Target FPS” field in the camrecorder settings of the preferences window. That will make sure the camera path is using the right frame rate. In order to play back the camera file at the right frame rate, you can edit the “Maximum frame rate” input in the graphics settings of the preferences window.
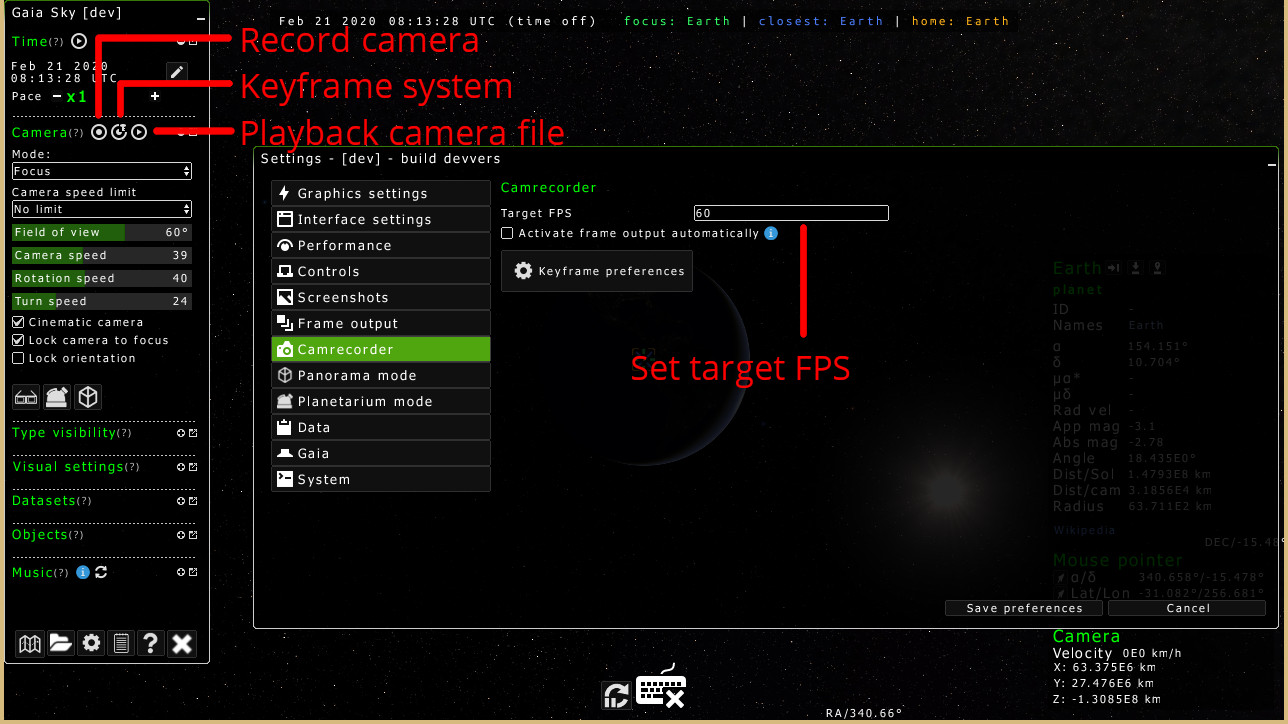
Location of the controls of the camrecorder in Gaia Sky
More information on camera paths in Gaia Sky can be found in the camera paths section.
Keyframe system
The camrecorder offers an additional way to define camera paths based on keyframes. Essentially, the user defines the position and orientation of the camera at certain times and the system generates the camera path from these definitions. Gaia Sky incorporates a whole keyframe definition system, which is out of the scope of this tutorial.
As a very short preview, in order to bring up the keyframes window to start defining a camera path, click on the icon ![]() .
.
More information on the keyframe system can be found in the keyframe system subsection of the docs.
Frame output system
In order to create high-quality videos, Gaia Sky offers the possibility to export every single still frame to an image file. The resolution of these still frames can be set independently of the current screen resolution.
You can start the frame output system by pressing F6. Once active, the frame rate will go down (each frame is being saved to disk). The save location of the still frame images is, by default, $GS_DATA/frames/[prefix]_[num].jpg, where [prefix] is an arbitrary string that can be defined in the preferences. The save location, mode (simple or advanced), and the resolution can also be defined in the preferences.
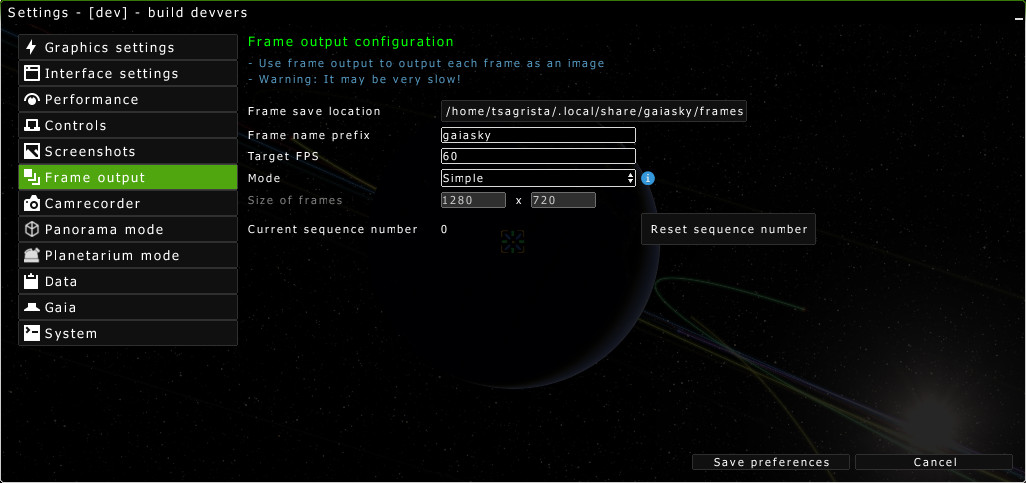
The configuration screen for the frame output system
Once we have the still frame images, we can convert them to a video using ffmpeg or any other encoding software. Additional information on how to convert the still frames to a video can be found in the capturing videos section.
Scripting
This section includes a hands-on session inspecting pre-existing scripts and writing new ones to later run them on Gaia Sky.
More information on the scripting system can be found in the scripting section.