

Planetarium mode#
Gaia Sky supports different planetarium modes, depending on the projector setup.
Single projector:
Azimuthal equidistant (fisheye, dome master) projection.
Spherical mirror projection.
Multi-projector:
Use the MPCDI standard and connect various Gaia Sky instances.
Single-projector setup#
Gaia Sky can output a true azimuthal equidistant (dome master) and spherical mirror projected stream suitable for single-projector dome or mirror setups. If you need to separate the UI from the planetarium render window, you have two options:
Create an external view: External views.
Connect two instances running (possibly) on different computers: Connecting Gaia Sky instances.
Hint
To activate the planetarium mode, click on the ![]() icon in the camera section of the control panel. Exit by clicking
icon in the camera section of the control panel. Exit by clicking ![]() again. You can also use the shortcut ctrl + p. Switch the projection with ctrl + shift + p. If it does not work, remove the $GS_CONFIG/mappings/keyboard.mappings file.
again. You can also use the shortcut ctrl + p. Switch the projection with ctrl + shift + p. If it does not work, remove the $GS_CONFIG/mappings/keyboard.mappings file.
Hint
F7 – Save the faces of the current cubemap to image files in the screenshots directory.
Just like the panorama mode, this planetarium mode runs by rendering the scene into a cube map (using separate renders for all directions \(+X\), \(-X\), \(+Y\), \(-Y\), \(+Z\), \(-Z\)) and renders it using an azimuthal equidistant (also known as dome master) projection or a spherical mirror projection.
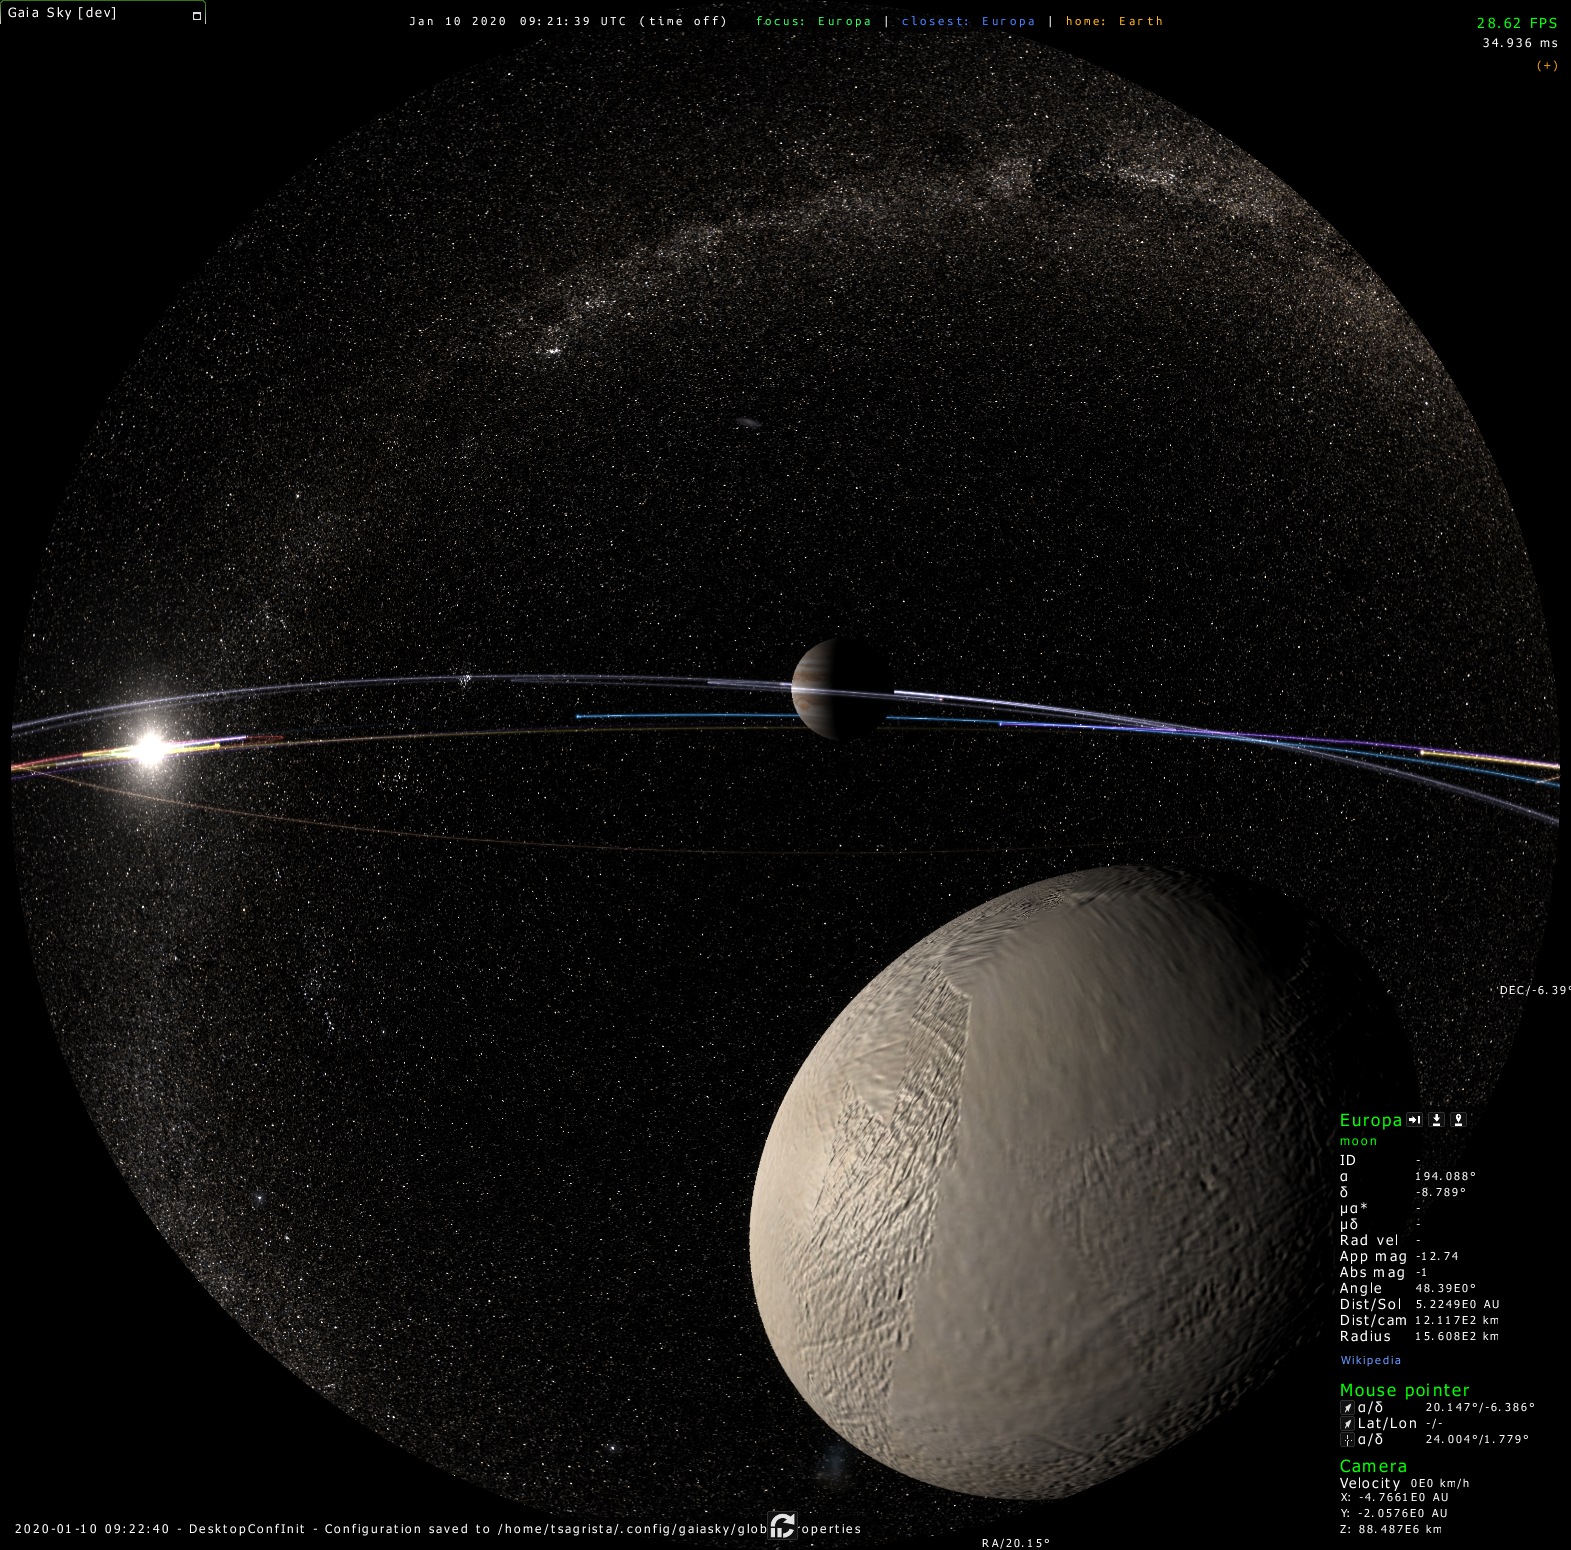
Planetarium mode with the azimuthal equidistant (fisheye, dome master) projection.#
Here are the planetarium mode settings. They can be modified in the preferences window, planetarium tab.
Cubemap side resolution – the resolution of each of the sides of the cubemap can be adjusted in the preferences window, planetarium mode tab.
Aperture angle – the default aperture is \(180^\circ\), corresponding to a half-sphere. However this angle can be adjusted to suit different dome types in the planetarium mode tab of the preferences window.
View skew – in focus mode, the view is skewed about \(50^\circ\) downwards. This setting is not adjustable as of now.
Spherical mirror projection#
Gaia Sky supports the spherical mirror projection, where the image is projected using a regular projector and a spherical mirror. For that, the user needs a warp file which defines the surface deformation. You can find some common warp files in our data repository. The spherical mirror file format is described in this post by its creator, Paul Bourke. We reproduce it below, in the spherical mirror format subsection.
spherical_mirror.mp4 – video of the spherical mirror projection, open in new tab!
In planetarium mode, you can switch the projection mode with ctrl + shift + p.
In the preferences window, ![]() Planetarium mode tab there is one extra setting that applies only to the spherical mirror projection:
Planetarium mode tab there is one extra setting that applies only to the spherical mirror projection:
Warp mesh file – select the warp file you want to use. This only applies when the spherical mirror projection is being used.
Planetarium mode with the spherical mirror projection.#
File format#
This content is from Paul Bourke’s website describing the spherical mirror file format.
First line contains the mesh type, currently rectangular (2) and polar (1) are supported, see figure 3. The only significant difference between these two is the mesh continuity that occurs for the polar mesh across the 0 and 360 degree boundary.
Second line contains two integers indicating the mesh dimensions, nx and ny.
The subsequent lines define the nodes, there should be nx times ny lines. These lines contain 5 values defined as follows.
Position x and y of the node in normalised coordinates. The mesh need not exactly match the projected image, in figure 2 it actually extends off the projected region while in figure 4 it matches the 4:3 aspect exactly. In the later case the horizontal range (x) will be +- the aspect ratio and the vertical range (y) will be +- 1 (ie: OpenGL style normalised coordinates).
Texture coordinate u and v, these should each range from 0 to 1, they refer to the original input image. Values outside the 0 to 1 range indicate that the node is not to be used, this usually means the mesh cells sharing that node are not used but sometimes it is appropriate to triangulate the mesh for such cells.
A multiplicative intensity value applied to each r,g,b colour value. The can be used for simple edge blending and to compensate for brightness variation due to different light path lengths from projector to projection surface. This intensity correction should range from 0 to 1, negative values indicate that the node should not be drawn. So 0 indicates none of the corresponding colour, 1 indicates fully saturated. Nodes with intensities outside this range should not be used. Note that per colour, gamma corrected edge blending requires three separate intensity scale factors, one for each r,g,b. While this is a simple extension to the format it is not included here and left to the reader to implement if required.
Multi-projector setup#
Gaia Sky offers support for multi-projector setups, where a number of slave instances (each with its own viewport, field of view, warp and blend settings), are synchronized with a master (presenter) instance. Each slave is in charge of producing the image for a single projector and has a different view setup, geometry warp and blend mask. The current section only deals with the configuration of the view, warp and blend parameters for each slave.
Hint
The configuration and setup of the connection between master and slave instances is documented in the “Connecting Gaia Sky instances” section.
Additionally to the configuration needed to connect master and slaves, the slave instances need a special view, resolution, warp and blend configuration. These depend on the specifications, location and orientation of each projector, as well as the projection surface.
The following settings can be configured:
The yaw angle – turn the camera right
The pitch angle – turn the camera up
The roll angle – rotate the camera clock-wise
The field of view angle
The geometry warp file – a PFM file that contains the destination location for each source location in normalized coordinates
The blend mask – an 8-bit RGB or RGBA PNG file with the blending mask
The master-slave connection happens via the REST API server in Gaia Sky.
Gaia Sky offers two ways to configure these settings for each slave instance:
Using the MPCDI standard file format
Using the configuration file of Gaia Sky directly
MPCDI#
Gaia Sky partially supports the MPCDI format in order to configure each instance. You will need a single .mpcdi file for each projector/gaia sky instance. Each file contains the resolution, the yaw, pitch and roll angles, the field of view angle and optionally a PFM warp file and a PNG blend mask. Gaia Sky does not support the MPCDI format fully, here are some caveats.
Only the ‘3d’ profile is supported
Only one buffer per display is supported
Only one region per buffer is supported, and this region must cover the full frame
Only linear interpolation is supported for the warp file
In order to set the .mpcdi file for an instance, set/edit the following property in the instance’s configuration file:
program.net.slave.config=[path_to_file]/instance_config.mpcdi
Gaia Sky configuration file#
If you do not have the MPCDI files for your projector setup, you can also configure each instance directly using the Gaia Sky properties file for that instance.
Usually, each instance has a configuration file with the name config.slave[n].yaml, without the brackets, where n is the slave number. Open this file for each instance and set/edit the following properties.
# If you don't have an mpcdi file, use these next properties to
# configure the orientation. In order for this to work, you also
# need to set fullscreen=true, the right fullscreen resolution
# and the right field of view angle.

# Yaw angle (turn head right)
program.net.slave.yaw=[yaw angle in degrees]
# Pitch angle (turn head up)
program.net.slave.pitch=[pitch angle in degrees]
# Roll angle (rotate head cw)
program.net.slave.roll=[roll angle in degrees]
# Warp pfm file
program.net.slave.warp=[path to PFM warp file]
# Blend png file
program.net.slave.blend=[path to 8-bit RGB or RGBA PNG file to use as blend mask]
Re-projection shaders#
The planetarium mode can be simulated in a geometrically incorrect manner by using the post-processing re-projection shaders. These work on the final image after the perspective projection, and re-project it using different algorithms. Please, refer to the re-projection section for more details.
For some shaders, you may want to use a greater field of view angle than the maximum. You can do so by directly editing the configuration file. For example, we can set the field of view to \(160^\circ\) like so:
scene:
   camera:
      fov: 160.0
Finally, since the re-projection shaders stretch the image, it may be desirable to use a larger resolution for the back buffer. This operation is experimental and not recommended, but it works. Refer to the back-buffer scale section for more information.